

|
DIY
Shop Now
|


Published: 03/03/2015
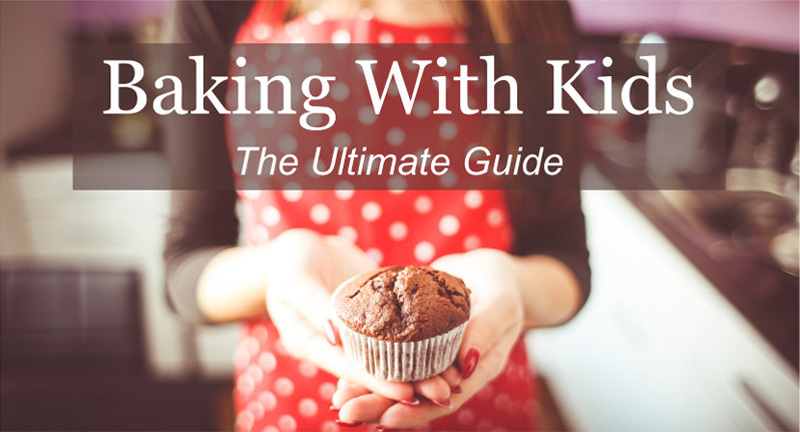
Baking With Kids: The Ultimate Guide
Baking with kids can be a fun experience, but it can also be a messy and stressful one – particularly for the adults involved! Mum and dad are often the ones left to clean up the chaos in the kitchen, while the children create more mess on the worktops.
But if you prepare effectively, you can bake with your children without the added stress. We've put together this detailed guide to baking with kids to help you overcome the drama of a messy kitchen, whilst also making it fun and educational for your children.
In this guide you'll learn how to involve children in the following stages of baking:
- Pre-baking preparation steps
- Gathering and measuring and ingredients
- Mixing the ingredients using various techniques
- Preparing different mixtures for baking
- Passing the time during the baking process
- Decorating cakes and biscuits
- Tidying the kitchen
Ready? Let's bake!
Step 1: Hygiene and preparation
Perhaps best done before your children enter the kitchen, one of the first things to do is remove any items that you don't need for baking that might distract your child.
Once the kitchen is tidy and clean, it's time to get going. First, everyone involved in the baking should wash their hands with an antibacterial soap – including you! It might also be a good idea to keep a bowl of water at the ready for the ingredients stage, as this is when things can get particularly messy!
Your child should already be wearing old and easy-to-wash clothes, but it might also be a good idea to let them wear an apron to offer further protection. If you wear an apron yourself, it might prove to be a lot easier to get the child to wear theirs.
Once you're prepared, it's time to get baking!
Step 2: Measuring the ingredients
First things first, you'll need to measure the ingredients out to follow your recipe. This stage can be fun for children, especially if you turn it into an entertaining game. Encourage them to find the ingredients and bring them to you, before you start to measure them out.
As well as being fun, it proves to be a good educational experience for young children. It enables them to discover where things are kept in the kitchen, and which ingredients need to be kept cold or refrigerated.
You can also let them get involved in the measuring and weighing of the ingredients to keep them involved. Again, this can be fun as well as informative, teaching them about weights and measurements.
Weighing
There are a couple of options available to you when it comes to weighing ingredients – do you want to use mechanical or digital kitchen weighing scales?
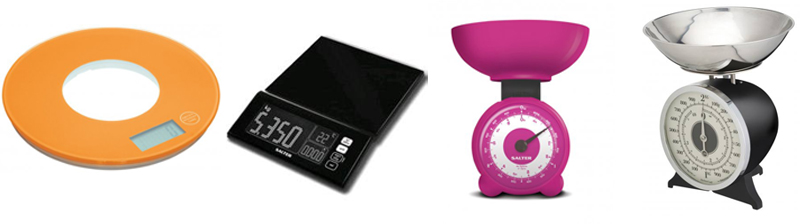
Digital scales are much easier to read, usually coming with a big, clear screen that displays the numbers. Alternatively, a set of mechanical scales might be better for older children as they usually display both imperial and metric measurements. They are therefore good to use if you are teaching your children about weight conversions and analogue measurements.
Smaller measures
Many recipes will require smaller quantities of some ingredients, such as baking powder, bicarbonate of soda, food colouring or flavourings like vanilla essence.
Most of the time, these measurements will be in tablespoons or teaspoons. You could use ordinary household spoons, but why not add a little fun into the process with colourful measuring spoons?
Cracking eggs
If the recipe requires eggs, things could start to get a little messy. However, learning to crack eggs is a life skill that your children will need eventually, so it's always good to let them have a go.
It might take them a while to get the hang of it, so make sure you have plenty of eggs – certainly more than the recipe says you'll need. A good tip is to crack each egg into a different bowl first. This way, if there is a bad egg amongst the rest, or a piece of shell falls in, at least the other eggs won't get contaminated.
Keep the ingredients separate
When measuring out, keep your ingredients separate so that you'll know what has been done and what still needs to be measured.
Using different coloured bowls can add a fun touch to the kitchen as well as making it easy for you and your children to differentiate between the ingredients. Silicone measuring bowls are also microwave-friendly, so are good for melting butter or chocolate safely and quickly.
Step 3: Mixing it together
Now you've got your ingredients measured out and ready in their individual bowls, it's time to mix them together.
This is one of the most fun parts for children, as they watch the ingredients come together like magic. As they get older they can start to experiment with learning new mixing techniques such as folding and whisking.
However, to start with, it's good to let them get used to a simple stirring method of combining your ingredients. Most smaller children will find it easier to use both hands, so it's easier if you hold the bowl still while they stir.
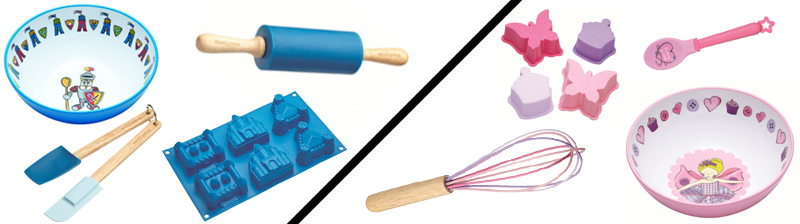
Tall sided mixing bowls are great at this point, as they help to prevent against splashes and spillages. If you've baked with children before, you'll know they can get a bit excitable in the kitchen, particularly when mixing. If they do get carried away, having a tall sided, shatter-proof and scratch resistant set of mixing bowls can prevent any accidents.
You can even find mixing bowls and baking equipment that will be perfect for little boys and girls. For the guys, the Miniamo Sir Bakealot range features cartoon knights and medieval characters. The Fluttercup and Friends range is aimed at girls, featuring pink and purple fairies and princesses.
As well as mixing bowls, these ranges both include fun accessories such as whisks, spoons and spatulas.
Remember that they've only got little arms – they'll get tired quicker than you will! So keep an eye on them whilst they're stirring and mixing. If they need help, you can always give the mixture one last stir to ensure the ingredients are well mixed.
This stage of the process is also a messy one, so remember to wear aprons. A PVC apron is easy to wipe clean after you've mixed ingredients – and the cute and fun images also add an extra light heartedness to your morning or afternoon in the kitchen.
For many children, baking is an inspiring activity that brings a sense of magic and mystery. To keep up this idea, you could add some unnecessary but fun gadgets into your baking. An egg separator is a fun way to separate egg whites from the yolks, and will give the children one of those moments of magic they love.
Step 4: Rolling and preparing for baking
Once you've got your mixture ready, you're nearly there. But first, you need to prepare the mixture for baking. If you're making biscuits, you might need to leave your dough in the fridge to firm up (check your recipe), but if it's a cake or buns that you're making, you can do this step straight away.
Cakes and buns
If you're baking a cake or buns with your children, the mixture can usually be poured straight into the mould or tin that you've selected. Traditional cake tins are usually non-stick to help with the removal process once they've been baked. Spring form tins make it even easier – simply unlock the clasp when the cake's ready and it will be easy to take out.
To make things more fun and exciting for the children, you could use a flexible silicone mould. These are available in a range of fun shapes and sizes, which make it entertaining during the baking process, but also at the end when the mould is removed to reveal a shaped and embossed cake.
For smaller buns and fairy cakes, you can either pour the mixture into paper cases on a baking tray, or use silicone cases which can be washed and re-used. The silicone option again makes it more fun and exciting for children, especially if they include fun designs!
Biscuits and cookies
If it's biscuits or cookies you're making, you'll need to roll out the biscuit dough before putting them in the oven. This is yet another fun stage for children, but if there's a lot of dough to be rolled out, they can get tired quickly. If that's the case, separate the dough into several more manageable sections. You can also help out if it gets too much for them.
Next, you'll be looking to use cookie cutters to make the biscuits into the shape you and your children want. But be careful – traditional cutters often have sharp corners and edges which can be dangerous for children.
Instead, use cutters designed for baking with kids, which come with interesting and fun designs. They will also leave an imprinted design in the cookies, which can make it easier for children to decorate the biscuits after cooking.
If your child prefers a simpler design that gives them more freedom during the decorating stage, regular children's cookie cutters and cutter cubes can provide a safe way to cut your biscuit dough.
Step 5: Passing the time
Once your child has poured the mixture or cut out the biscuits, put them in the oven to bake according to the recipe's instructions. Now is the time when children might get a bit bored and restless waiting for the goodies to be ready to eat.
To overcome this, you can make the tidying up process more fun to keep their mind occupied.
Why not time them to bring dirty bowls safely to the washing area? Perhaps you could try turning the putting away process into a memory game - “where do the scales belong?” or “where does this spatula go?”
Again, this will not only be fun, but will also start to give children more knowledge of how the kitchen works and which items belong where.
Step 6: Decorating
The most exciting part is here! Once your cakes or buns have been removed from the oven and left to cool for the required amount of time, its time for you and the children to decorate your tasty treats.
Unfortunately for you, this might also be the messiest part – but remember how much fun it is for the kids. Aprons on, icing at the ready, it's fun for the children to decorate their own cakes and buns.
An icing syringe or piping set can make it even more fun, allowing children to practice drawing and creating their own designs on the biscuits.
For smaller children, it might be a little hard for them to push the icing through as they draw. If this is the case, you could hold the tube with them and squeeze the icing through as they move the syringe and draw the shapes.
Step 7: Tidying up
Whilst the cakes or biscuits were cooking, you should have done most of the washing up and tidying, so once the goodies are finished you shouldn't have much to do.
All that will need cleaning is the icing equipment and maybe any cooling racks or baking trays that the treats were resting on.
Involve the children in this final clean up, as it will help them to understand that no job is complete until everything is tidied away.
And then you can get on to the final step...
Step 8: Eating!
Now all of the hard work is done, there's nothing better than sitting down for a well earned break with one of the cookies or buns you've baked together.
Just remember to save some for the children!
Change with the seasons
Many people instantly think of baking with children as a winter or autumn activity, when the weather is too bad to go outside. But that doesn't have to be the case.
You can vary your recipes to suit the seasons; fruit tarts and flans are lovely and refreshing during the spring and summer!
Any you could even use the cake moulds to make jelly which can be enjoyed with ice cream for a cooling treat. And how about the fun of making lovely home made iced lollies?
Do your children love baking? We'd love to see what kind of treats you've been making.
Leave a comment below and let us know, or Tweet a picture to @Barnitts!


